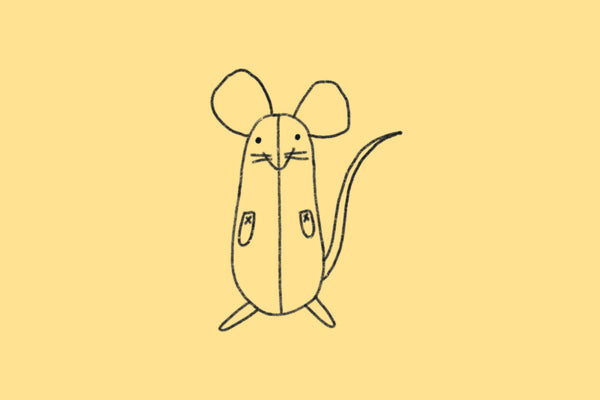
Inspired by Kate DiCamillo's ever-wonderful The Tale of Despereaux, Flight Magazine brings you a tutorial on how to make your own little felt mouse!
We'd recommend this tutorial for artists aged 8 and up. If you'd like to try this with younger artists (we're big fans of giving things a go!), try increasing the size of the pattern, and removing the gusset piece.
You'll need:
- Felt: we recommend wool felt if you can find it - it's lovely and soft, and better for the environment than polyester!
- Embroidery thread: we recommend DMC - it comes in a huge range of colours, and is easy to work with.
- Fabric scissors: nice sharp ones will make it easy to get well cut pieces.
- Needles: we recommend a medium length needle, with a large eye to make for easy threading.
- Stuffing: you can rip up an old pillow, use some fabric scraps, or buy stuffing.
- Fabric marker: this isn't a necessity, but it makes transferring your pattern over really easy! The markings will disappear with water or heat, depending on your type of marker.
- Decoration suggestions:
- Fabric scraps
- Ribbons
- Beads (try black seed beads for the eyes!)
- Cardboard or paper
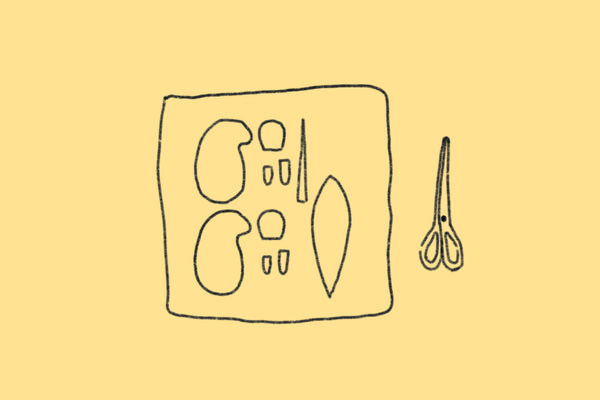
Once you’ve got all of your supplies ready, print and cut out your paper pattern pieces (download the pattern here). You can then trace around your pieces to transfer the pattern onto your felt. Remember to cut out two of your ears, arms, legs, and body!
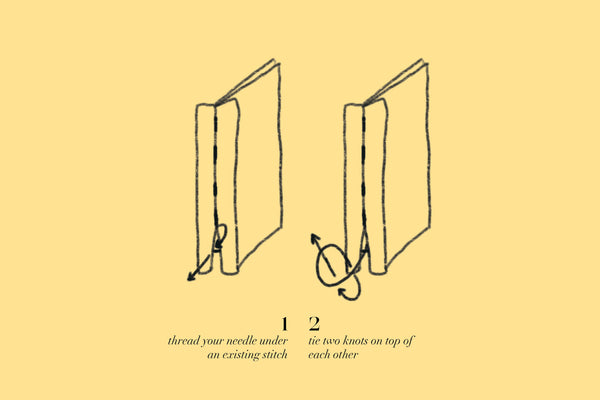
Thread your needle! Cut a length of thread about 60cm (or from the top of your fingers to your elbow). You can separate embroidery thread into six strands – try using one strand at a time. Make sure you tie a knot at one end of your thread. To tie a knot, make a loop with your thread and pass the end of your thread back through the loop. Tie two knots on top of each other to make sure you won't pull the knot through your fabric.
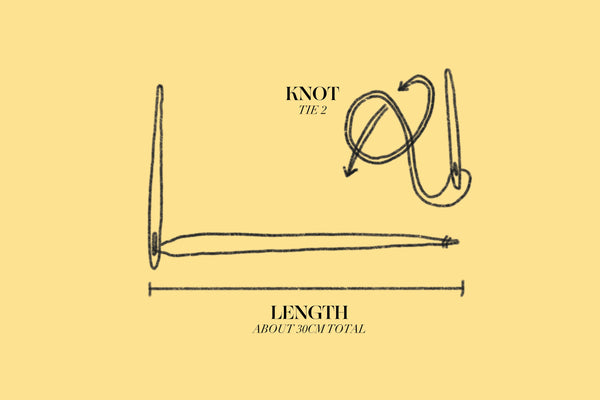
Tip: threading your needle like this (tie the two ends together) means you won't be able to pull your needle off!
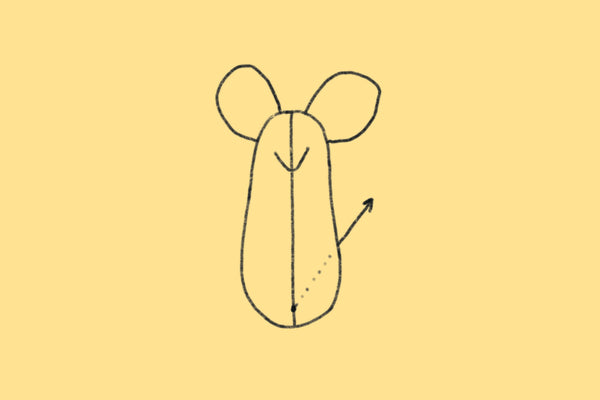
First, you need to attach the gusset (the leaf shaped piece) to one side of your body. Stitch carefully from the nose to the base of your mouse.
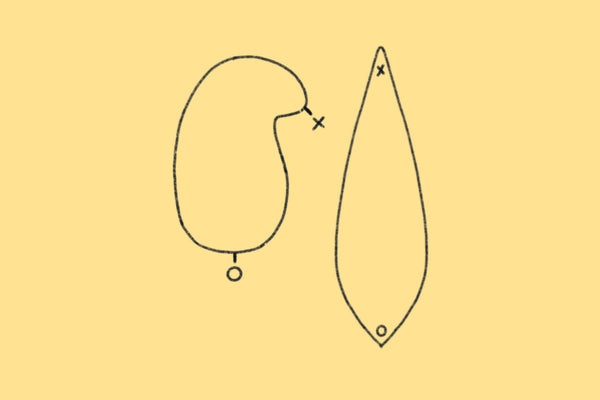
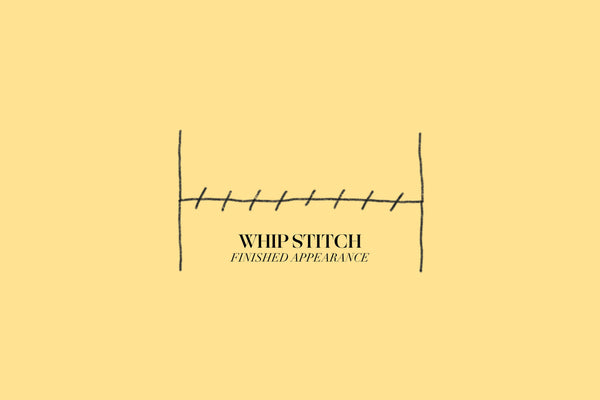
We’d recommend using whip stitch (simpler) or backstitch (more complicated). Here’s some great tutorials on how to do these stitches, if you’d like to watch a video! Whip stitch & backstitch.
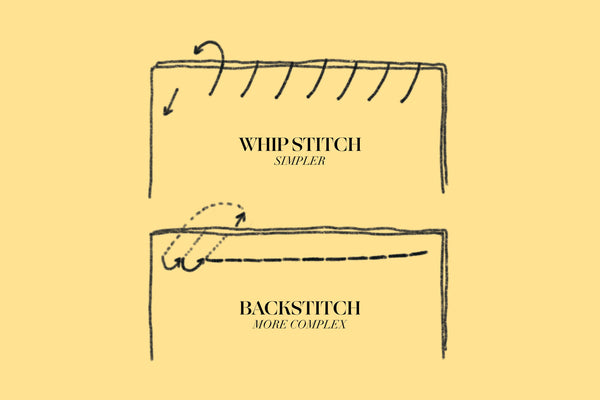
Make your stitches quite tight. You’ll need to turn your mouse through at the end, so tight stitches will mean your mouse won’t have holes.
Remember to stop stitching when you have a hand’s length of thread left. This will give you enough thread to tie a proper knot. Here’s a video tutorial on how to knot your thread.
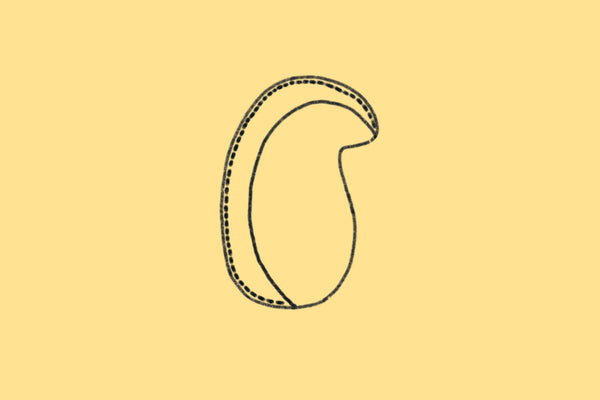
Now, you’ll need to attach the other side of your mouse body! Stitch all the way around, leaving a 2cm hole at the base.

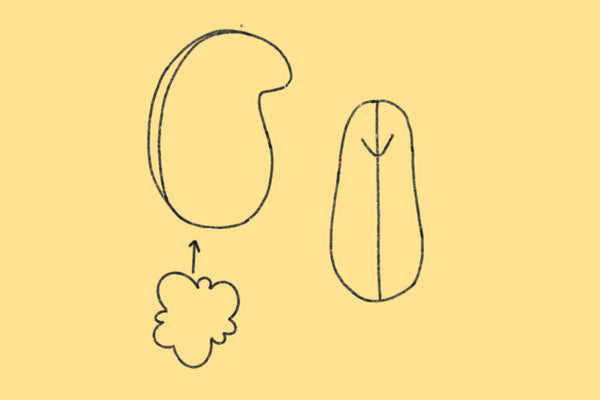
Turn your mouse through, so your stitches are on the inside. Your mouse will be looking a little like a jellybean. Now you can stuff your mouse – gently push in small pieces of stuffing a little at a time, until your mouse is looking full.
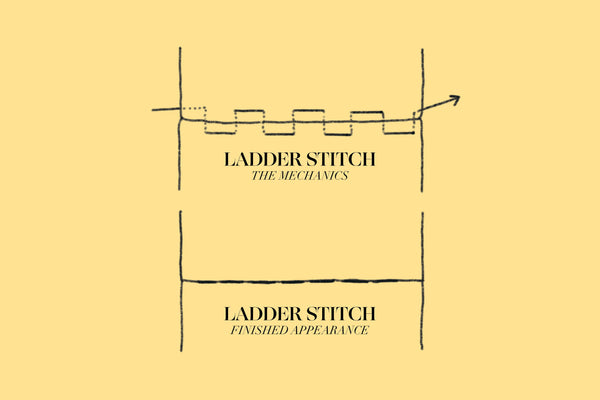
Stitch up the base of your mouse. You can either use whip stitch (which will be visible when finished), or a special stitch called ladder stitch (which will be invisible when finished).
Now your jellybean is looking a little more like a mouse – but it’s missing some important features. You can now add in your ears, arms, legs, and tail!
To attach each of these pieces, you can use a small whip stitch. This will be slightly visible, but we think that's the charm of a handmade mouse.
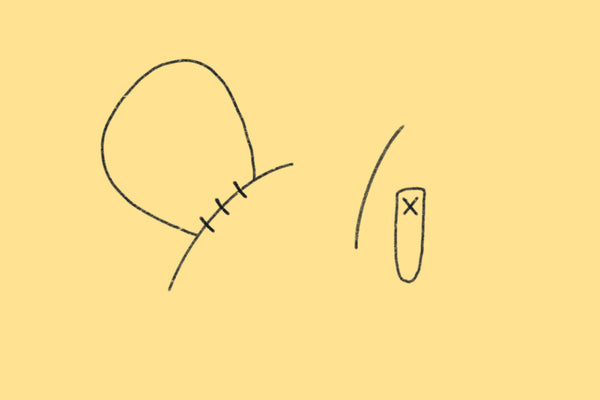
To hide the knot at the end of your thread, try going in through one of your seams and pulling gently to get the knot to disappear inside. Then, you can poke your needle up from the inside to where you’d like it to be.
Whip stitch between the piece you’d like to attach and the body of your mouse. Remember to knot your thread when you've finished attaching a piece – you can go back to a seam to do this. To hide the end of your thread, push your needle through the body and out the other side, squish your mouse a little, cut your thread, and watch the thread disappear inside!
What else can you add? Some eyes? Whiskers? Some clothes? Get creative and use your new stitches and skills!
P.S. We'd love to see what you make! Tag us in your photos @flight_kidsmag or send us some pictures through hello@paperbird.com.au!